After I posted my basic bread recipe last week, I had several questions about a healthier/whole grain loaf. Good news: you can totally take my basic recipe & pump it up into a grainy, chewy, good-for-you loaf with minimal effort. How funky you make this bread is totally up to you; keep it easy with things you probably already have in your pantry, like rolled oats, sunflower seeds, & whole wheat flour, or branch out into more interesting flours like rye or barley, whole grains like bulghur wheat or wild rice, & tasty flax or millet. The world is your… um, bread oyster. Yeah.
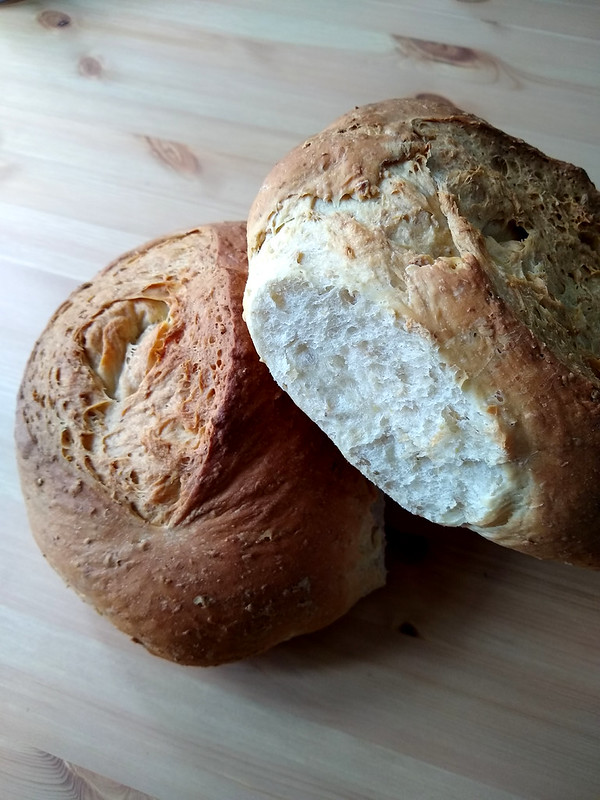
This is just a variation on my original bread post, but I’m going to write out the full recipe & process again here, so you don’t have to click back & forth between posts if you’re making the whole grain version. I went with a round loaf for this one, rather than the oval from the original recipe, but you can make whatever shape suits your fancy.

Rolled oats, sunflower seeds, poppy & flax seeds, whole wheat flour
Whole Grain Bread
Yields 2 loaves
2 1/2 c water, milk, buttermilk, or a combination thereof
1 1/2 c rolled oats, multigrain hot cereal, bulghur/cracked wheat, wild rice, sunflower seeds, pumpkin seeds, or a combination thereof
Scant T salt
2-4 T sugar, honey, maple syrup (may be reduced or omitted)
4 T butter or vegetable oil
Scant T instant yeast
2 c whole wheat, rye, barley, or other whole grain flour
2-4 T seeds (poppy, flax, millet, sesame)
2 T vital wheat gluten (may be omitted)
Appx 3 c all purpose or bread flour, more as needed

Step 1: Hydrating your grains & starting your wet phase
At the end of this phase, you’ll have all of your liquid, salt, sweetener, fat, & any optional grains gently warmed & melted & ready for your flour & yeast.
Bring your 2 1/2 c of liquid to scalding, either by boiling water in a kettle, or heating your milk in a saucepan/in the microwave. While things are heating up, place your grains in your mixing bowl. Add your butter/oil, your optional sweetener, and your salt. When your liquid is really hot, pour it over the grains, etc., & stir to combine. Let sit uncovered for about twenty minutes, stirring occasionally, until your grains are softened, your butter melted, & the mixture is only just warm, not hot, to the touch. When in doubt, let it cool a little more. This is your wet phase. Welcome!

Step 2: Adding yeast & flour
Once your wet phase is cooled (it should feel warm enough that it’s sort of nice to cuddle in the bowl, but definitely not the kind of temperature you’d want your bath, or your coffee), top it with your whole grain flour, your seeds, & your gluten, then add your yeast. Using a dough hook if you’re using a mixer, or your very clean hand, mix it together into a sloppy batter, making sure the yeast isn’t clumping up. Add another 2 cups flour & mix gently to combine into a sloppy dough. Add more flour 1/2 c at a time, mixing each addition in completely before adding more.
The final amount of flour will vary greatly depending on how thirsty your whole grains were, which whole grain flour you’re using, bread vs all purpose flour, the time of year, the age of your flour. Don’t just keep adding flour because the recipe calls for it; making bread is less about precision & more about intuition. Don’t panic, you got this!
As you add flour, your dough will start to pull together, & you’ll start to see the stretchy gluten strands developing. If you’re using a mixer, the dough will start to crawl up the hook & stick to the bottom of the bowl; this is totally okay. If you’re mixing by hand, take your time & try to keep your dominant hand in the dough while your other hand holds the bowl & adds the flour; you’ll end up less of a sticky mess this way.
The number one mistake bakers make is adding too much flour to their bread dough. Forget everything you ever heard about the dough having to clean the sides of the bowl before it’s ready; that’s only right for a few kinds of bread, & definitely not what we’re making here. You’re looking for a soft, stretchy dough that is starting to pull away from the bowl a little, but is still pretty sticky at the bottom. When you get to this stage, stop mixing, scrape the dough off your hands (an old gift/credit card is perfect for this), & let the dough rest for five minutes; this lets the flour finish absorbing the liquid in the dough, giving you a much better idea of the final texture of the dough.
After five minutes, mix the dough again for a few turns & decide if it needs a little more flour; it’s okay if it’s a little sticky, but you do want a dough that you can actually get out of the bowl without it oozing all over the counter.

Step 3: Kneading
When you’re satisfied with your dough texture, dust a little flour on your counter & turn the dough out onto it. Use your hands & your dough scraper/gift card to fold the edges into the center to make a rough ball, & dust it with a little more flour. Gently knead your dough for a few minutes to smooth it out:
Use your dominant hand to gently pull the top edge of your dough up & towards you & down, while your non-dominant hand cups the side of the dough reassuringly. Use the heel of your dominant hand to gently push that top edge down into the center of your dough, then away from you; think of it like cranking a handle towards you, up, towards you, down, away. Then use both hands to rotate the ball of dough a few inches around, & repeat your cranking motion – hey, you’re kneading bread!
Your dough will be a little sticky to handle at first; just keep dusting it very lightly with flour so you can keep your hands relatively clean. As you knead, your dough will magically tighten up, smooth out, & start to feel bouncy & springy & alive.

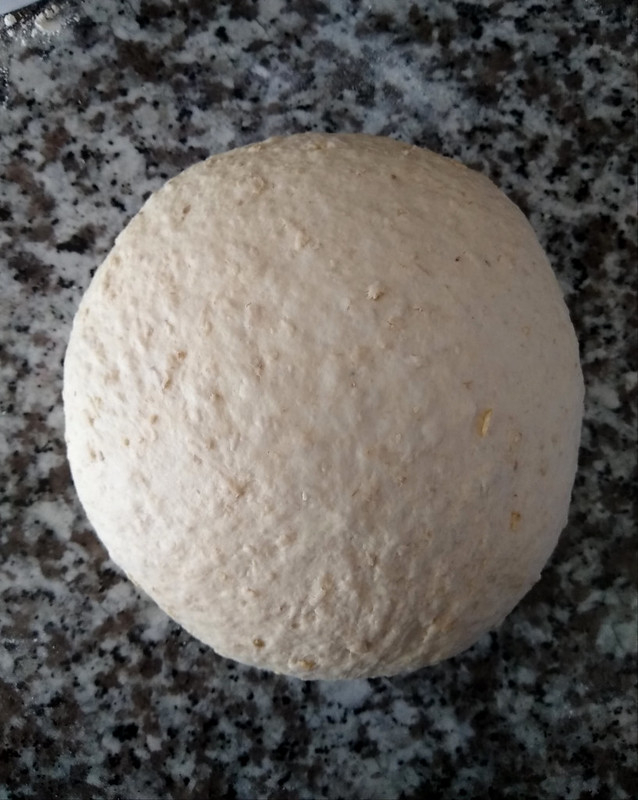
Step 4: The Rises
Once you get that magic bouncy feeling in your dough, enjoy it for a few more turns, then flip your dough over so the smooth side is on top, & plop it right back in your mixing bowl – no oil for you, sucker! A well kneaded dough doesn’t need it. Cover your bowl with plastic/beeswax wrap, or a cheap shower cap, & let it sit at room temperature to rise. You don’t need to put it somewhere particularly warm unless it’s the dead of winter & you don’t have heat; the residual warmth from the wet phase will be plenty of heat.
Neat trick: you can do steps 1 to 3 in the evening, after dinner, & instead of leaving your dough at room temperature, you can put it in the fridge to rise overnight. This does magical things in terms of flavor development & texture, & allows you to have freshly baked bread for brunch without getting up at 5 in the morning.
You can do a single rise, allowing your dough to double in size once before shaping it into loaves, but I like to do two rises; I find I get a better texture in the finished bread, & it tends to keep fresh a bit longer. But one rise is totally fine, especially if you’re new to the game.
Step 5: Shaping & Proofing
Once your dough has doubled your preferred number of times, enjoy the never-gets-old thrill of punching it down by gently plunging a very clean fist straight through the center of your dough. Listen to the hiss and praaaap of the built up air escaping, & marvel at the deliciously pillowy texture of your dough. It’s truly one of life’s best littlest joys.
Gently pull your dough out of the bowl onto a lightly floured counter & pat it into a plump rectangle; don’t use a lot of force here, your dough doesn’t need to be bullied to do its job. Use your dough scraper or a knife to divide your dough into two mostly equal parts, & move one to the side.
Firmly but tenderly pat & press your first dough half into a rough square, then pull the corners into the center to start shaping your round loaf. Gently pull the edges into the center, too, working around until you have a nice round shape. Pinch your edges closed & turn your loaf over so the seam is on the bottom. Use the pinky edges of your hands to tuck around the edges of your loaf, gently shaping it into a plump round. Repeat with the other half of your dough.
If you want to get really sexy, spread about half a cup of rolled oats into an 8 inch circle on your counter. Spray or brush the top of your loaf with a bit of water, then gently pick it up & cradle it in your hand, top side up. Tenderly roll the wet surface of your dough in the oats, keeping your hand on the dough, rocking it around to get oats over as much of the surface as you can, then roll your hand back the way it came so your loaf is upright again. This is a spectacularly sexy & satisfying maneuver that will make you feel like A Real Bread Baker(tm).
Place your shaped loaves onto your baking pan of choice; I use a half sheet pan with a Silpat because I am lazy & don’t mind “rustic” shapes to my bread, but you can absolutely use lightly oiled round cake pans as well. Either way, once your loaves are situated, spray them liberally with cold water & leave to rise at room temperature. You don’t need to cover them unless you’re in a really drafty kitchen, or you think the cat will jump on the counter to investigate.
Preheat your oven to 375F, & allow your loaves to rise for about 40 minutes as the oven gets good & warm. Spray the oats with water every ten minutes or so, to keep them moist & improve their chances of staying on during baking.

Step 6: Baking
Check in on your loaves after about half an hour or proofing; they should be rising nicely. Gently prod a loaf with your finger; if your fingermark bounces back out, your loaves need a bit more time. If your fingermark stays, it’s time to get in the oven!
I don’t do any fancy glazes or scoring with these loaves; this is everyday bread, cut-to-the-chase bread, get-in-my-belly bread. I do use a serrated bread knife to make one shallow slash running the length of the loaf, just to help it expand in the oven. Be SUPER gentle when scoring your loaves; too much pressure or tugging/tearing will deflate them.
Once slashed, get your loaves in the oven with a minimum of door banging & pan slamming. Then leave them alone!
Check on your bread after half an hour; it will be big & beautiful & starting to brown. If your oven tends to cook unevenly, this is a good time to GENTLY turn your pans; again, to banging, no slamming.
After 45 minutes, your bread should smell amazing & be nearly done. Using oven mitts or a clean tea towel, gingerly turn a loaf over & knock on the bottom; if it sounds hollow & deep, it’s done! If it still sounds a little dense & flat, give it another ten minutes in the oven.
When you’re confident your bread is finished, pull it from the oven & let it cool on the pan for five minutes before transferring to a cooling rack; DON’T let it cool in the pan, unless soggy crusts are your thing.

Step 7: Waiting is the Hardest Part
I know, it’s torture, but let your bread cool for a minimum of twenty minutes, ideally an hour, before slicing into it. Cutting into hot bread is always disappointing; the starches are still gluey and the interior is doughy & sticks to the knife & it’ll give you heartburn for days. Trust me, let your bread settle & cool properly & you will be rewarded.
Once cooled, store your bread in a ziploc bag at cool room temperature, & it will keep for a week with no trouble. It also freezes beautifully, & makes a wonderful gift in these lonely times.
Thanks for reading, & I hope you can get baking soon!